
Reflection Refraction and Translucency
- Jan 10, 2023
- 3 min read
Updated: Feb 15, 2023
Project 2 (VSFX 420 Technical Compositing)
February 15 2023 (Class 12)
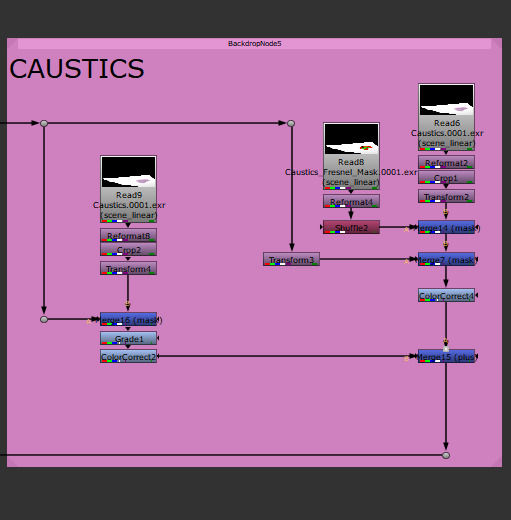
I decided to fix the caustics from the previous version I submitted. This is the final result with the breakdown on how I achieved it.
Nuke Script:

February 13 2023 (Class 11)
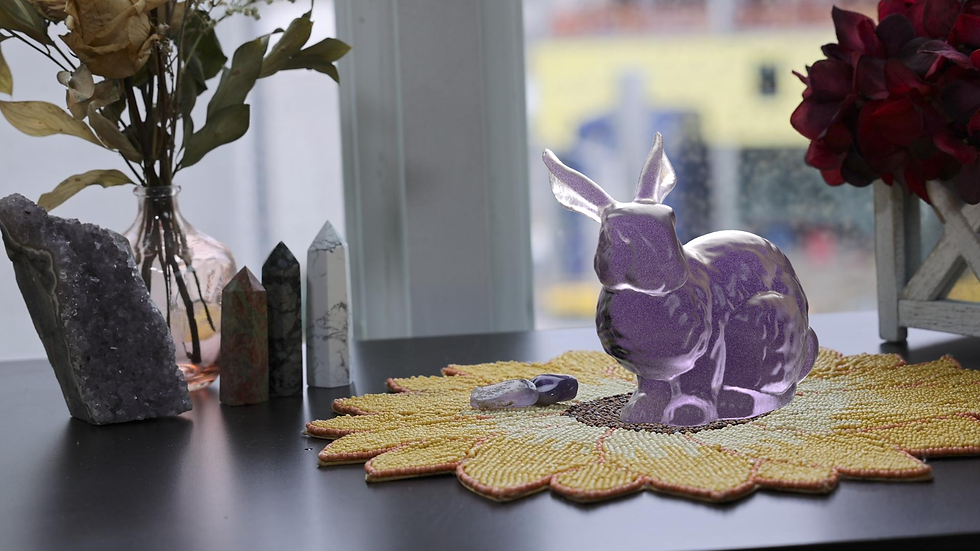
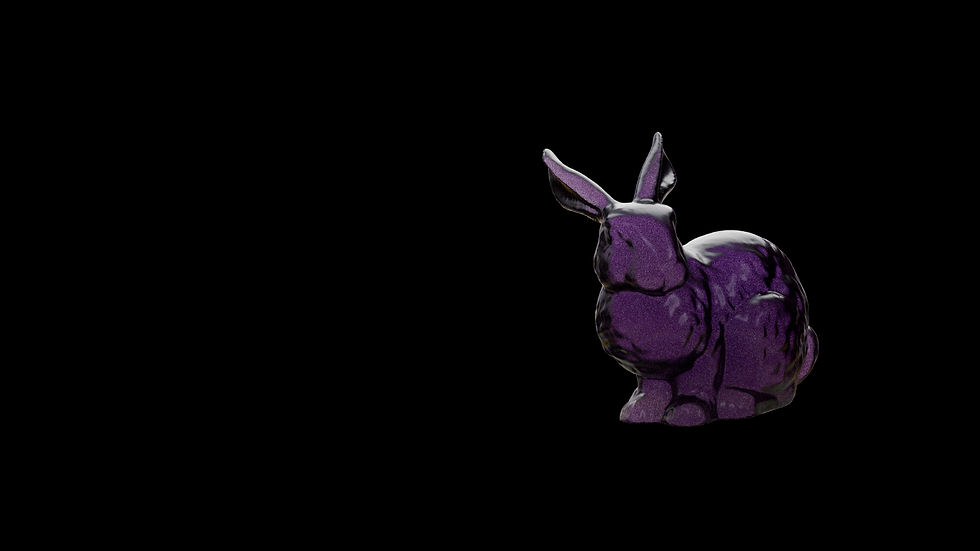
Final result for Reflection, Refraction and Translucency project.
Nuke Script:

I improved the sliding noise problem by doing a planar projection of simplex noise on the aiStandardVolume.
For the caustics, I made a new render layer with a new aiStandardVolume with displacement on it so it could give me an organic colored shadow.

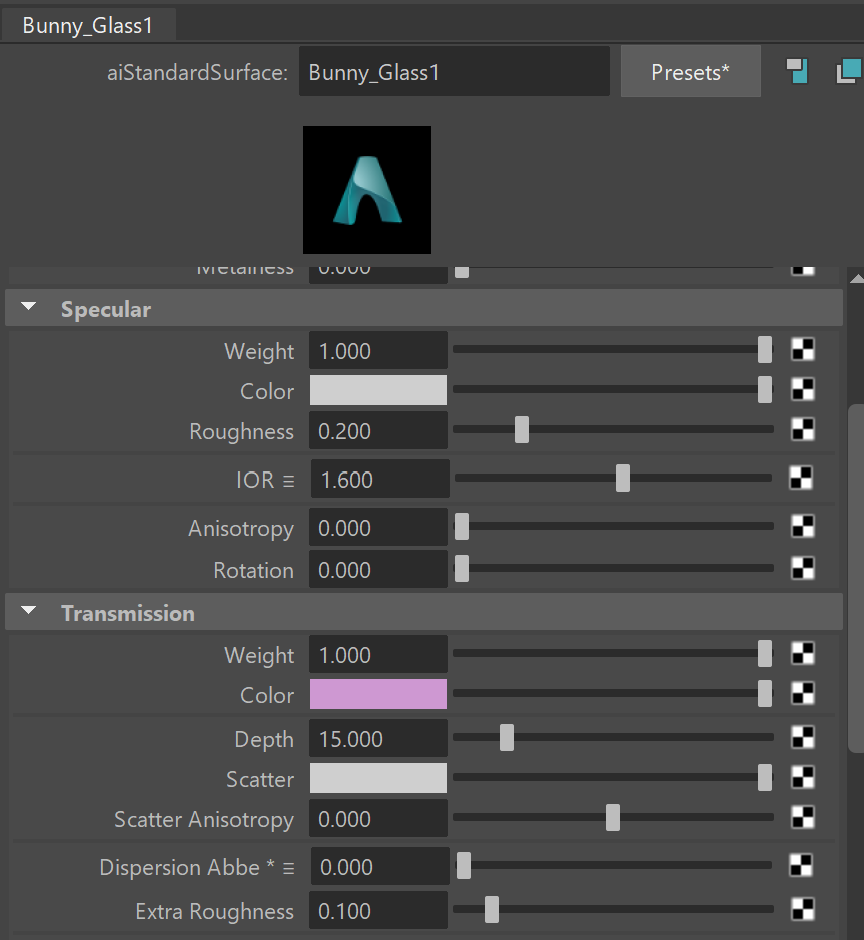
Settings:

I also rendered a Fresnel Mask on the shadow to control the values of the inner part of the caustic (lighter) and the outer part of the caustic (darker)

Settings:

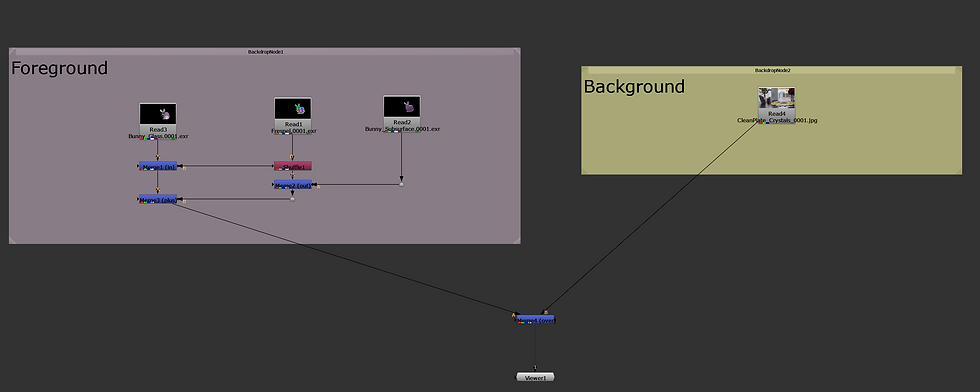
In Nuke, I merged the two versions and colored grade them separately.
Results:
Outer area:

Masked inside area:

Merge Plus both versions:

Nuke Script:
February 8 2023 (Class 10)
For today's work in progress, I focused mostly on troubleshooting the sliding noise and creating caustics.
Here is a still of how the caustics look after compositing.

Nuke Script:

Here is an initial tests of the caustics. Where I used a mesh light instead of the spotlight.

I just rendered one frame of the caustic and it took one hour to render. I believe I need to reduce the samples, move the mesh light and adjust its intensity to optimize render time.
Rendered Caustic Frame:

Material Settings:


Samples:

Mesh Light Settings:

As for the noise sliding, I was able to fix the marble material on the subsurface by creating a texture reference object. However, I did the same for the aiVolume but the simplex noise keeps sliding. I also tried projecting it instead but have not been successful.
February 6 2023 (Class 9)
Results so far of the amethyst shader and animation:
One of the biggest issues I have is that the marble material slides with the animation and doesn't stay attached to the geometry.
Nuke Script:

Creating the Shader:
I decided to take a new approach on creating the solid effect in the inside of my model. Instead of adding geometry inside the glass layer, I created density using aiStandardVolume on a new render layer. I also projected some simplex noise to create the subtle variation inside the geometry.
aiStandardVolume:

Settings:


Simplex Noise Settings:

To add more detail, I added a marble material to the subsurface renderlayer and merge(over) in Nuke with the Volume layer.
Subsurface:

Settings:


Marble Settings

Merge(Over) in Nuke :

I also changed the fresnel mask so there would be a smoother transition between the glass edges and solid interior of the material.
Fresnel:

Fresnel Settings:

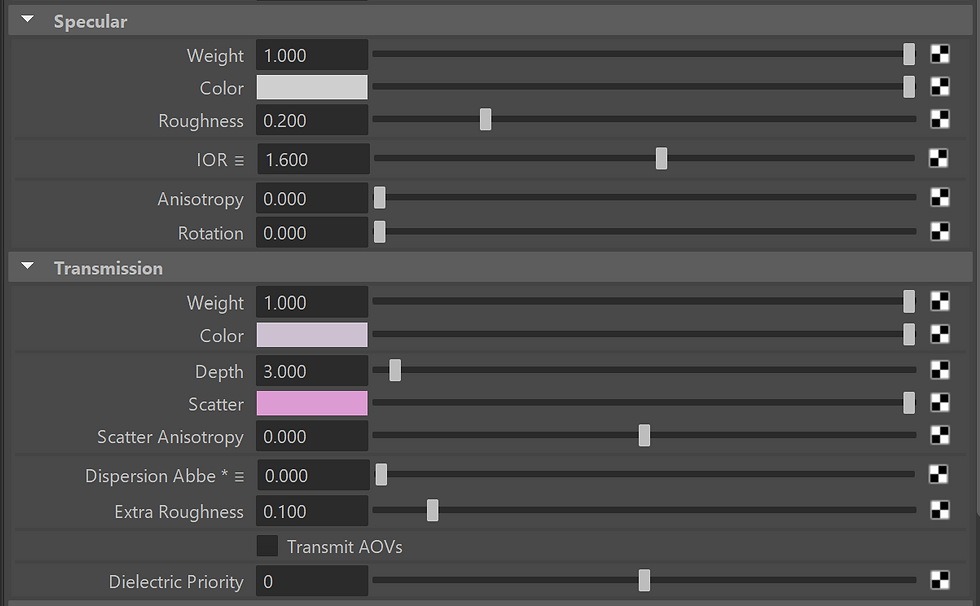
Glass Layer:

Settings:
Shadow Pass:

February 1 2023 (Class 8)
For today's post I have been exploring and diving deep into creating the amethyst shader. I have been having a hard time getting the accuracy of it and there are some things that I need to troubleshoot.
This is the overall result so far rendered from Nuke:
Nuke Script so far:
To achieve this result, I rendered out a pass with just transmission, another with just subsurface and a type of Fresnel surface shader (made with a ramp) that would serve mi as a mask.
New References:
I would like for the ears and thin areas to look more like the rock on the right and the rest of the bunny to be more like the amethyst on the left.


Glass Pass:
For the glass, I started adding geometry within the model to make it seem that it is more solid in the inside making it more accurate to my rock.

Glass Settings:
Troubleshooting:
When I was adding the geometry within the model, it seemed that no matter what color was the geometry, the refraction would always be black/a very dark hue. I tried changing the lighting scenario as well but it didn't work. It always looked like this:


Subsurface Pass:

SS Settings:

Fresnel Mask Pass:

Fake Fall Off:
I also tested a different approach in Maya to combine the different layers by using an aiMixshader but the color of the glass shader was very different compared to how it seemed in Nuke:
Settings:

January 30 2023 (Class 7)
These are some reference images I took over the weekend. I used the Canon R5 to take these pictures.
Cube

Grey Ball

Shadow Plate

HDRI

Clean Plate:
Behind the Scenes:
Rock Reference:

Camera Match:

Settings:

Light Match:
To match the lighting, I used the grey ball image as my main reference. I used the HDRI as my main light source, since when adding a spotlight the results were not as accurate and clean as with just the HDRI. I also added a plane with a black surface shader to make the darker reflection on the right side of the ball.
Saved Image from Arnold Renderview:

Scene Set up:

Subsurface Shader:
Saved Image from Arnold Renderview:

Subsurface Settings:

Comments